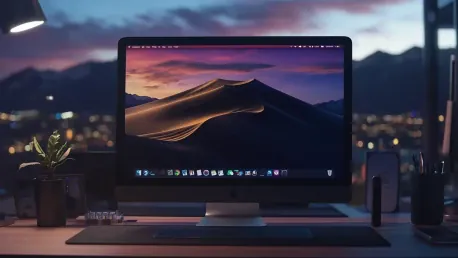

Installing macOS Ventura on a Windows PC using VMware might seem like a challenging task, but with the right guidance, you can achieve it smoothly. Whether you are a developer testing your applications on macOS or a curious tech enthusiast wanting to experience macOS without purchasing Apple hardware, this guide will take you through the necessary steps. From ensuring your system meets the requirements to configuring virtualization settings and setting up a virtual machine, we’ll cover every part of the process to make sure you can run macOS Ventura seamlessly on your Windows PC.
1. Verify macOS Ventura System Requirements
Before you begin the installation process, it is crucial to verify that your computer meets the necessary system requirements for macOS Ventura. Ensuring that your hardware can handle the new operating system will save you from potential performance issues down the line. macOS Ventura requires a minimum of 8 GB of RAM, which will allow the system to operate smoothly and handle multitasking without significant slowdowns. Additionally, you will need at least 150 GB of storage space to accommodate the macOS installation and any applications you plan to use. It is also recommended to have a CPU with at least four cores to ensure optimal performance, although a dual-core processor can suffice if necessary.
Running macOS Ventura on insufficient hardware could lead to a sluggish experience and may cause system stability issues. Therefore, take the time to check your computer’s specifications before moving forward. If your system does not meet these requirements, consider upgrading your hardware or opting for another method to explore macOS Ventura.
2. Enable Virtualization Technology
One of the most critical steps in setting up macOS Ventura on VMware is to enable virtualization technology on your Windows PC. Without virtualization, creating a virtual environment for macOS is not possible, effectively halting the entire process. First, you need to check whether virtualization technology is supported on your motherboard and whether it is enabled. Start by opening the Task Manager using the shortcut Ctrl + Shift + Esc. If this is your first time accessing the Task Manager, click on “More options” at the bottom. Navigate to the “Performance” tab and then click on “CPU.” Here, you will find the status of virtualization technology on your system.
If virtualization is disabled, you need to enable it from your computer’s BIOS settings. Restart your computer and enter the BIOS setup by pressing the designated key (commonly F2, F10, or Delete) during boot-up. Look for the virtualization technology setting, which may be labeled as Intel VT-x, AMD-V, or simply “Virtualization.” Enable this option, save the changes, and exit the BIOS. Enabling virtualization is essential for running virtual machines effectively, so make sure this step is not overlooked.
3. Install VMware Workstation
VMware Workstation is a powerhouse in the realm of virtualization, allowing you to run multiple operating systems on a single PC. For the purpose of setting up macOS Ventura, you can either use VMware Workstation Pro or the free VMware Player. Both options offer robust features, although the Pro version comes with additional functionalities that might be beneficial for advanced users. Begin by downloading the appropriate version of VMware Workstation from the official VMware website. Once the download is complete, run the installer and follow the prompts to complete the installation process. Generally, the default settings provided during installation are sufficient, so you can mostly click “Next” through the setup.
It’s important to note that installing VMware on your system will not impact your primary operating system. It will merely provide a platform for creating and managing virtual machines. After installing VMware Workstation, launch the application and familiarize yourself with its interface. Understanding how to navigate VMware will ease the process when you start setting up the macOS Ventura virtual machine.
4. Apply macOS Unlocker
Apple’s operating systems are not natively supported for virtualization using VMware products, primarily due to licensing restrictions and hardware exclusivity. However, you can enable macOS as a guest OS in VMware by applying a tool known as macOS Unlocker. This tool modifies VMware’s configuration files to allow the installation of macOS. You can download the macOS Unlocker from a trusted repository such as GitHub. Once downloaded, extract the contents of the archive. Locate the installer file named “Win-Install.cmd,” right-click on it, and select “Run as Administrator.” This will execute the necessary scripts to modify VMware and enable macOS support.
The process might take a few minutes, and it’s essential to let it complete without interruption. Once finished, VMware will recognize macOS as a viable guest operating system option. Using macOS Unlocker is crucial; without it, you will not be able to proceed with the macOS Ventura installation on VMware. Ensure that you download macOS Unlocker from a reputable source to avoid any potential security risks.
5. Obtain macOS Ventura ISO Image
The next critical step is to obtain an ISO image of macOS Ventura, which will serve as the installation media for your virtual machine. Unfortunately, Apple’s official distribution methods do not include a direct ISO or CDR image. However, you can either download a pre-made ISO from a trusted source or create one yourself if you have access to a Mac. To create an ISO image on a Mac, use the “Terminal” application and follow a series of commands to convert the macOS installer into an ISO format. This process ensures you have a clean and compatible installation media.
Having a reliable ISO image is essential as it directly affects the installation routine within VMware. Be cautious about the source from which you obtain the ISO; ensure it’s from a verified site or repository to avoid potential malware or corrupted files. With the macOS Ventura ISO image ready, you are one step closer to running macOS on your Windows PC.
6. Set Up macOS Ventura Virtual Machine
Setting up the virtual machine for macOS Ventura in VMware is a straightforward yet critical process. Begin by opening VMware Workstation and selecting “Create a New Virtual Machine.” In the wizard that appears, choose the “Typical” option and proceed to the next step. Since you will provide the installation media later, select “I will Install the Operating System later.” For the guest operating system, choose “Apple Mac OS X,” and ensure that “macOS 13” is selected as the version. Name your virtual machine and save it to a location on your hard drive where you have ample storage.
Next, specify the storage size for the virtual machine. Allocating at least 150 GB is advisable to ensure you have sufficient space for the operating system and additional applications. Opt to store the virtual disk as a single file, which can improve performance and manageability. Once you reach the hardware configuration step, customize the settings to match the requirements outlined in the first step. Add the macOS Ventura ISO image to the virtual machine by selecting “New CD/DVD (SATA)” and choosing “Use ISO image file.” Complete the setup by clicking “Finish.”
7. Format the Virtual Hard Drive
With the virtual machine created, it’s time to format the virtual hard drive using Disk Utility available in the macOS recovery mode. Start the virtual machine and boot into the macOS recovery environment. Select your preferred language and proceed to the main menu. Click on “Disk Utility” to access the tool required for partitioning the virtual hard drive. Select the virtual hard drive from the left-hand panel and click on “Erase” from the top menu. When erasing the drive, configure the parameters as follows: Name it “macOS 13,” set the format to “APFS,” and use “GUID Partition Map” as the scheme.
Partitioning the virtual hard drive is necessary to prepare it for the installation of macOS Ventura. Once the drive is formatted, exit Disk Utility and return to the main recovery menu. Select “Install macOS 13 beta” to begin the installation process. Click “Continue,” agree to the terms, and select the newly formatted hard drive for installation. The initial copying of files will take some time and will involve several restarts along the way. Once the file copying is complete, the virtual machine will proceed with the basic setup of macOS Ventura.
8. Complete Basic macOS Ventura Setup
After the macOS installation files are copied, the virtual machine will guide you through the basic setup process for macOS Ventura. The first step involves selecting your country, which is important for regional settings and language configurations. Based on your selection, macOS may suggest additional languages. The next step offers an improved accessibility setup. Apple has made significant strides in accessibility, but you can choose to configure these settings later if preferred.
Network connectivity is often a challenge during initial setup within a virtual machine. Opt for “my computer does not connect to the Internet” to bypass this step initially. You can configure network settings later once the installation is complete. The data and privacy section requires careful reading, as it outlines how Apple will use your data. Agreeing to these terms is necessary to proceed. The Migration Assistant helps transfer data from another computer, but you can skip this step if not applicable.
Finally, you will need to agree to the terms and conditions, and create a local user account if not connected to the Internet. The setup will also ask about enabling location services and sending analytics data to Apple. These can be optionally configured based on your preferences. The setup concludes with selecting a look and feel for macOS Ventura, and you are ready to start exploring the new OS.
9. Resolve Network Connectivity Issue
Once macOS Ventura is fully installed, you may notice that the virtual machine does not automatically connect to the Internet. To fix this issue, you need to make some changes in the VMX configuration file. Begin by shutting down the virtual machine and navigating to the directory where the macOS Ventura virtual machine files are saved. Locate the VMX file and open it using Notepad or any text editor. Press Ctrl + F to open the search function and look for the line Ethernet0.VirtualDev = “e1000e”.
Replace “e1000e” with “vmxnet3” and save the file. This change configures the virtual machine to use a different network adapter, resolving the connectivity issue. Restart the virtual machine, and you should find that macOS Ventura now connects to the Internet without any problems. This step is crucial for enabling online features and updates, ensuring that your macOS experience is as close to native as possible.
10. Install VMware Tools
Installing VMware Tools on your macOS virtual machine enhances performance and functionality significantly. It resolves issues such as screen resolution, graphics performance, and enables additional features like drag and drop and copy-paste between the host and guest operating systems. Start by selecting “Install VMware Tools” from the VMware Workstation interface. This will mount the VMware Tools installer in macOS Ventura.
Open the mounted VMware Tools and run the installer. Follow the on-screen prompts, typically involving a few simple steps. Once the installation is complete, restart your macOS virtual machine. After rebooting, you will notice that the screen resolution adjusts automatically, and performance improvements should be apparent. VMware Tools are indispensable for a smooth virtualized macOS experience, so ensure this step is not skipped.
11. Enable File Sharing
File sharing between your host operating system and the macOS virtual machine is essential for productivity, especially if you intend to transfer files frequently. The drag and drop functionality provided by VMware Tools makes this process seamless. To enable this feature, open the “System Settings” in macOS Ventura by clicking on the Apple icon and selecting “System Preferences.” Navigate to the “Privacy & Security” section and find “Accessibility.” Within Accessibility settings, look for “VMware Tools daemon” and toggle it on. You may need to enter your administrator password to confirm this change.
With drag and drop enabled, transferring files between Windows and macOS becomes straightforward. Additionally, you can use external storage devices for file transfer, though this method is less efficient compared to the built-in drag and drop functionality. Enabling this feature improves the integration between the host and guest operating systems, creating a more unified working environment.
12. Create a Snapshot
Creating a snapshot of your virtual machine after setting up macOS Ventura ensures that you can quickly revert to a stable state if any issues arise. VMware allows you to take snapshots, which capture the state of the virtual machine at a specific point in time. To create a snapshot, ensure your virtual machine is powered off and navigate to the VMware interface. Select the macOS Ventura virtual machine and click on “Snapshot” from the menu. Choose “Take Snapshot,” provide a name and description for the snapshot, and confirm the action. This snapshot will serve as a backup, allowing you to revert to this state if necessary. Installing macOS Ventura on a Windows PC using VMware may initially seem challenging, but with proper guidance, it becomes manageable. Whether you’re a developer who needs to test applications on macOS or a tech enthusiast curious about experiencing macOS without splurging on Apple hardware, this guide will walk you through the steps necessary for a successful installation. Start by ensuring your Windows system meets the required specifications for running both VMware and macOS Ventura. This includes having adequate RAM, CPU power, and storage space. Once your system is ready, you’ll configure the virtualization settings in VMware to prepare for the macOS installation.
The next step involves creating a new virtual machine in VMware and assigning it the resources it needs, such as memory, processor cores, and disk space. You’ll also need a macOS Ventura ISO file to serve as the installation medium. Throughout the process, you’ll adjust various settings to ensure macOS runs smoothly within the virtual environment. Finally, after completing the setup and configuration, you can boot up your new macOS Ventura virtual machine and begin testing applications or simply exploring the macOS ecosystem, all from your Windows PC. This method offers a cost-effective way to leverage macOS capabilities without having to invest in Apple hardware, making it a valuable option for many users.