
The global supply chain for storage semiconductors has shifted dramatically as high-bandwidth memory production consumes the lion’s share of manufacturing capacity to satisfy the insatiable appetite of the artificial intelligence sector. This reallocation of resources has naturally led to a noticeable price hike in consumer-grade external storage solutions, turning what was once a routine purchase into a significant investment that many shoppers find difficult to justify. As retail prices for branded external solid-state drives and high-capacity flash drives continue to climb, a growing number of technology enthusiasts are discovering that they already possess the components needed to bypass these market pressures. By looking within their own desk drawers or retired computer systems, users are finding perfectly functional internal drives that can be transformed into high-performance external storage units for a fraction of the cost of a new retail product. This shift toward repurposing hardware represents a more sustainable and economically savvy approach to data management in an era where traditional retail options are becoming increasingly expensive and often offer less value for the money spent on basic enclosures.
Evaluating Hardware and Drive Profiles
Part 1: Assessing Different Generations of Internal Storage
Understanding the specific performance characteristics of legacy hardware is the first step in creating a successful DIY external storage solution that meets modern needs. Older mechanical hard drives, which were the standard for decades, often end up in storage bins after being replaced by faster solid-state technology during system refreshes. While these “spinning” drives are significantly slower than modern flash-based alternatives, they still offer high capacities that are ideal for cold storage or secondary backups where immediate data access speed is not a priority. A hard drive from the early 2010s may only offer transfer speeds of around 100 MB/s, yet it remains a reliable vessel for storing large photo libraries or document archives that would otherwise occupy expensive space on a primary system drive. By identifying the type of connection an old drive uses, such as the standard SATA interface, users can select an appropriate bridge to modern systems without overspending on features the drive cannot actually utilize.
Part 2: Categorizing Hardware by Use Case and Performance
Solid-state drives from the mid-2010s represent the most versatile candidates for repurposing due to their balance of speed, durability, and relatively low power consumption. Even an entry-level SATA SSD can provide a much more responsive experience than the highest-end mechanical drive, offering nearly instantaneous file access and sustained transfer speeds that saturate the 5 Gbps or 10 Gbps limits of common USB ports. These drives are particularly well-suited for active workloads, such as running portable applications or editing high-definition video directly from the external unit. Furthermore, as NVMe drives from just a few years ago are replaced by the latest PCIe 5.0 standards, these older NVMe sticks become prime candidates for high-speed external kits. Because they are designed for internal bus speeds that far exceed what most USB ports can handle, they provide a performance overhead that ensures the external connection is always the bottleneck, rather than the drive itself, resulting in a very consistent and snappy user experience.
Selecting the Right Enclosure
Part 1: Choosing Between Budget and High-Performance Housing
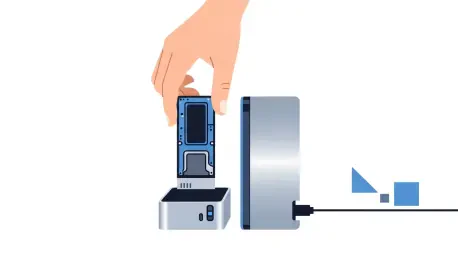
The enclosure is the most critical component of a DIY storage project because it serves as the physical and electrical bridge between the raw internal drive and the modern computer interface. For older SATA drives, budget-friendly plastic enclosures are often sufficient because these drives do not generate excessive heat and their maximum speeds are well within the thermal limits of basic materials. Many of these affordable housings feature tool-free designs that allow a user to slide a drive into place and secure it in seconds, making the assembly process accessible to anyone regardless of technical expertise. However, the choice of enclosure becomes much more important when dealing with high-performance NVMe drives, which are notorious for generating significant heat during intensive data operations. In these cases, a higher-end enclosure made from extruded aluminum is a necessary investment to ensure the longevity of the drive and prevent the controller from slowing down during long file transfers.
Part 2: Interface Standards and the Role of the Bridge Chip
Selecting an enclosure also requires a careful look at the internal bridge chip and the external interface standards it supports to avoid creating unnecessary performance ceilings. A bridge chip is the silicon responsible for translating the drive’s native protocol, such as NVMe or SATA, into a format that a USB or Thunderbolt port can understand, and not all chips are created equal. High-quality controllers from reputable manufacturers like Realtek or ASMedia offer better compatibility with various operating systems and more stable data transmission over long periods. Furthermore, users must match the enclosure’s rated speed to the drive’s capabilities; for instance, pairing a fast NVMe drive with a basic 5 Gbps USB 3.0 enclosure would result in a massive waste of the drive’s potential. Opting for a 10 Gbps or even a 40 Gbps USB4-compatible housing ensures that the repurposed hardware can operate at its peak performance while providing a level of future-proofing that most off-the-shelf retail drives simply cannot offer at a comparable price point.
Analyzing Performance and Benchmarks
Part 1: Comparing Synthetic and Real-World Speed Tests
When evaluating the effectiveness of a repurposed drive, synthetic benchmarks provide a clear picture of the maximum theoretical throughput that the DIY setup can achieve under ideal conditions. Tools like CrystalDiskMark or Blackmagic Disk Speed Test often show that a repurposed NVMe drive in a high-quality USB 3.2 Gen 2 enclosure can easily reach speeds of 1,000 MB/s, which is on par with some of the most expensive “Pro” labeled retail external SSDs. These tests demonstrate that the internal hardware, despite being older, is rarely the limiting factor when connected through a modern high-speed interface. However, synthetic tests only tell part of the story, as they usually involve short bursts of data that do not stress the system’s thermal capacity. Real-world performance is where these custom builds truly shine, as the larger physical volume of many third-party enclosures allows for better heat dissipation than the ultra-compact, plastic-heavy designs found in many mass-market retail products that are built primarily for aesthetics and portability.
Part 2: Endurance and Sustained Throughput Advantages
The true value of building a custom external drive becomes apparent during sustained write operations, such as transferring a large gaming library or several hundred gigabytes of raw 4K video footage. Many budget retail external SSDs use low-grade flash memory and very small internal caches, which causes their performance to plummet to mechanical-drive speeds once the initial buffer is full. In contrast, a repurposed internal drive was originally designed to handle the rigorous demands of an operating system, meaning it typically features higher-quality NAND flash and a more robust controller. When placed in an enclosure with a decent thermal pad and a metal shell, these drives can maintain their peak speeds for the entire duration of a large transfer without the aggressive thermal throttling that plagues smaller retail devices. This resilience makes the DIY approach not just a way to save money, but a way to obtain a higher-performing tool that is better suited for professional workflows and heavy data management tasks.
Efficiency and Technical Considerations
Part 1: Managing Thermals and Ensuring Drive Reliability
Thermal management is a frequent point of failure for high-speed storage, and the DIY approach offers a unique opportunity to address this issue more effectively than standard retail solutions. Because high-performance NVMe drives can reach temperatures exceeding 70 degrees Celsius under load, the use of thick thermal pads to bridge the gap between the drive and the aluminum enclosure shell is essential for drawing heat away from the sensitive silicon. This passive cooling method turns the entire enclosure into a giant heatsink, which is far more effective than the tiny internal heat spreaders found in most portable retail drives. Beyond heat, users must also be proactive about monitoring the health of their repurposed hardware by using S.M.A.R.T. monitoring software to check for signs of impending failure. Since these drives have already spent years in service, verifying the remaining write endurance and looking for reallocated sectors is a vital step in ensuring that the “new” external drive is reliable enough for important data.
Part 2: Compatibility Issues and Power Management
Another technical detail that requires attention is the power draw of the drive relative to the capabilities of the host computer’s USB ports, especially when using older mechanical hardware. While most 2.5-inch SATA SSDs and M.2 NVMe drives can run perfectly on the power provided by a single USB-C or even a USB-A port, older 3.5-inch desktop hard drives require a 12-volt power source that a standard USB port cannot provide. This means that users looking to repurpose large desktop drives must purchase enclosures that include an external power adapter, which reduces portability but allows for massive storage capacities. For mobile users, ensuring that the enclosure supports efficient power states is also important to prevent the external drive from unnecessarily draining a laptop’s battery when it is not in active use. Modern bridge chips are generally very good at managing these power states, but checking for firmware updates from the enclosure manufacturer can sometimes resolve connectivity issues or improve power efficiency on newer operating systems.
Maximizing Value and Compatibility
Part 1: Navigating Cost Savings and Interface Standards
The financial advantages of avoiding the retail storage market are particularly striking when looking at high-capacity drives where the markup for “portable” branding is at its highest. While a 4TB retail external SSD might carry a premium price tag that reflects both the cost of the flash and the manufacturer’s marketing budget, a user can often find a bare internal drive and a high-quality enclosure for significantly less. This price-to-performance gap is even wider for those who already own the drive, as the only out-of-pocket expense is the enclosure, which typically costs less than a few weeks’ worth of high-end coffee. Furthermore, the DIY approach allows the user to choose the exact components that matter most to them, such as prioritizing a rugged, waterproof housing or a sleek, ultra-slim design. This level of customization is rarely available in the retail market, where consumers are often forced to accept compromises in build quality or interface speed in exchange for a specific capacity or a recognizable brand name.
Part 2: Future-Proofing with Versatile Connection Hardware
One of the most common pitfalls in the external storage market is the “20 Gbps trap,” which involves a specific USB 3.2 Gen 2×2 standard that many computers and laptops do not actually support, leading to disappointing speeds. By choosing a versatile USB4 or Thunderbolt-compatible enclosure for a repurposed NVMe drive, users can ensure they are getting the maximum possible bandwidth from their current system while remaining compatible with future hardware. These high-end enclosures are designed to handle the fastest internal drives available today, meaning that even as the repurposed drive eventually reaches the end of its life, the enclosure itself can be reused with an even faster replacement. This modular approach to storage hardware is both environmentally friendly and economically sound, as it breaks the cycle of throwing away an entire device just because one component has become obsolete or failed. Investing in a high-quality enclosure today provides a foundation for a personal storage ecosystem that can evolve alongside the user’s technical requirements.
Final Strategy: Implementing a Sustainable Storage Ecosystem
The transition toward a DIY storage strategy proved to be a highly effective response to the volatile semiconductor market that defined the mid-2020s. By shifting away from overpriced retail products, users successfully mitigated the financial impact of the AI-driven memory shortage while simultaneously reducing the amount of electronic waste produced by discarded computer components. The process of pairing older, high-quality internal drives with modern, thermally efficient enclosures demonstrated that performance was often more a function of interface quality than the age of the underlying flash memory. This approach encouraged a more technical understanding of data management, as individuals learned to evaluate drive health and interface protocols to maximize their hardware’s potential. Ultimately, the success of these repurposed projects showed that the best storage solutions were often those already sitting on a shelf, waiting for a second life in a new housing. This movement fostered a community of users who valued durability and repairability over the convenience of a branded box, ensuring that high-speed data access remained affordable and accessible even during times of significant economic and industrial shift.