
Standard edge routers frequently struggle to provide clear visual boundaries between trusted wired networks and exposed server zones without demanding excessive manual configuration. In the contemporary landscape of high-performance networking, enthusiasts and professionals often find themselves overwhelmed by the sheer complexity of virtualized firewalls and complex VLAN tagging. While powerful software-defined networking tools offer unparalleled flexibility, they frequently lack the immediate, tangible feedback required during high-stakes security testing or rapid prototyping. The requirement for a dedicated, physical appliance that clearly delineates network traffic has led many back to specialized Linux-based distributions. These distributions prioritize a hardened security posture while maintaining a user-friendly interface that prevents the common mental fatigue associated with managing hundreds of overlapping firewall rules. By choosing a dedicated physical solution, an administrator can physically see and feel the boundaries of their digital environment, ensuring that a simple configuration error does not inadvertently expose sensitive data to the broader internet. This approach transforms the router from a mere gateway into a robust defensive perimeter that is as reliable as it is observable.
1. Select Appropriate Hardware: Foundation for the Lab
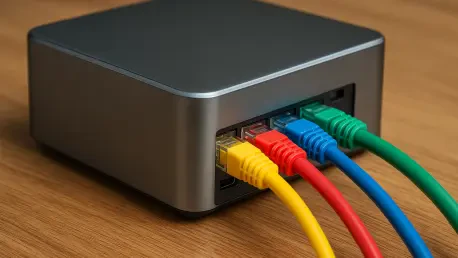
Selecting the right hardware serves as the critical first step in establishing a resilient physical laboratory environment. While enterprise-grade rack-mount servers are an option, compact mini PCs, such as those from the ZOTAC line, often provide the perfect balance of power consumption, footprint, and performance. A machine equipped with a modest processor, such as an Intel Celeron, is typically more than sufficient for routing duties, provided it is paired with adequate memory and storage. The most vital component, however, is the Network Interface Card (NIC) configuration. A truly effective lab router requires at least two independent Ethernet ports to establish a physical separation between the upstream wide area network and the internal laboratory segments. This hardware-level isolation ensures that traffic must pass through the CPU and the firewall software, preventing any possibility of a hardware bypass that might occur in a single-NIC setup using virtual sub-interfaces.
Furthermore, the inclusion of a compatible internal wireless card adds another layer of versatility to the hardware foundation. Modern Intel-based Wi-Fi modules are widely supported by specialized Linux distributions, allowing the physical lab to extend its reach into the wireless spectrum without the need for additional external access points. When choosing hardware in 2026, one should look for devices that offer easy access to the internal components, as upgrading the RAM or moving to a faster SSD can significantly improve the responsiveness of the web-based management interface. A machine with 8GB of RAM and a reliable solid-state drive provides a stable platform that can handle advanced features like intrusion detection systems or web-proxying without breaking a sweat. This physical presence on the desk or in the rack acts as a constant reminder of the network’s structural integrity, providing a sense of security that virtual machines often fail to replicate during complex troubleshooting sessions.
2. Define Your Network Layout: The Color-Coded Model
The architectural brilliance of IPFire lies in its intuitive, color-coded zone system, which provides an immediate mental map of the entire network topology. During the initial setup, a user is prompted to categorize their physical interfaces into specific colors: RED, GREEN, BLUE, and ORANGE. The RED zone represents the most vulnerable point, typically the connection to the upstream provider or an existing home network, and is treated by the system as untrusted. In contrast, the GREEN zone is the bastion of security, representing the trusted wired internal network where primary lab devices and workstations reside. This simple binary distinction forms the core of the routing logic, but the system allows for further granularity. By assigning each interface a color, the administrator gains a pre-defined set of security assumptions, reducing the likelihood of a catastrophic misconfiguration that could lead to unauthorized lateral movement across the network segments.
Beyond the basic wired zones, the system offers specialized segments that cater to more complex laboratory scenarios. The BLUE zone is specifically designed for wireless devices, allowing for a dedicated wireless lab that is isolated from the primary wired infrastructure. This is particularly useful for testing mobile applications or Internet of Things (IoT) devices that may have questionable security practices. Meanwhile, the ORANGE zone functions as a traditional Demilitarized Zone (DMZ), providing a safe harbor for public-facing servers that need to be accessible from the internet but should not have any access to the trusted internal GREEN network. This four-color model effectively replaces the need for complex, manually drawn network diagrams. Instead of remembering whether VLAN 10 can talk to VLAN 20, the administrator simply knows that GREEN is protected, RED is exposed, and BLUE is restricted. This clarity of purpose is what makes this specific distribution the premier choice for physical laboratories where speed and accuracy are paramount.
3. Map Physical Ports to Zones: Bridging Hardware and Software
Once the hardware is selected and the theoretical zones are defined, the practical task of mapping physical adapters to their respective colors begins. This process is handled during the console-based setup phase, where the system lists available adapters by their unique MAC addresses. For a device with multiple identical Ethernet ports, this can initially seem like a guessing game, but it serves as a valuable exercise in understanding the physical characteristics of the machine. An administrator might choose to assign the left-most port to the RED network and the right-most port to the GREEN network. This physical labeling is essential; marking the ports with colored tape or labels can prevent future connection errors that might lead to an accidental “loop” or a bypass of the firewall entirely. This stage of the process emphasizes the importance of the physical lab, where the connection of a cable is a deliberate and visible security action.
Verifying these assignments requires a hands-on approach that reinforces the administrator’s understanding of the network flow. By connecting a laptop to one of the ports and observing which network responds, the user can confirm that the RED interface is successfully receiving a DHCP address from the upstream router while the GREEN interface is ready to serve the internal lab. If the assignments are swapped, the system allows for a quick remapping within the console menu. This trial-and-error phase is not a drawback but rather a critical step in commissioning the lab. It ensures that the person managing the network has a deep, intimate knowledge of which cable leads to which zone. This level of certainty is particularly important when the lab is being used for high-risk experiments, as it provides a physical kill-switch: if something goes wrong, pulling a specific colored cable immediately severs the connection to that specific zone.
4. Configure IP Addresses and DHCP: Establishing Logical Boundaries
With the physical ports mapped, the next logical step involves defining the numerical boundaries of each network segment. For the RED interface, it is often most convenient to set the configuration to receive an address via DHCP from the primary edge router. This allows the lab to exist as a single client on the main home or office network, simplifying the upstream configuration. However, for the internal GREEN and BLUE segments, the administrator must take full control by assigning fixed IP addresses that define the gateway for those subnets. For instance, the GREEN network might be assigned a range like 10.77.50.1, while the BLUE network is placed on 10.77.60.1. Choosing distinct subnets that do not overlap with the upstream network is vital for preventing routing conflicts and ensuring that traffic can be accurately tracked as it moves between different laboratory zones.
Managing the clients within these zones is handled through the integrated DHCP server, which provides a centralized point for address allocation and local name resolution. By enabling the DHCP server on the GREEN interface, the administrator can designate a specific pool of addresses—such as 10.77.50.100 through 10.77.50.199—to be handed out to lab equipment. This automation ensures that any device plugged into the GREEN port is immediately integrated into the lab environment without manual IP entry. The same logic applies to the BLUE wireless zone, where a separate pool of addresses keeps wireless clients neatly organized. This systematic approach to addressing creates a structured environment where the IP address of a device immediately indicates its location and trust level. In the context of a physical lab, this structure is the backbone of all subsequent testing, providing the consistency needed to produce repeatable results across various experiments.
5. Establish Isolation Rules: Hardening the Perimeter
The primary goal of any lab router is to maintain strict isolation between the experimental environment and the rest of the world. By default, many routers allow traffic to flow from an internal network (GREEN) to an upstream network (RED) to facilitate internet access. However, in a lab setting, this can be a significant security risk if the “upstream” network is actually a home or corporate LAN. To mitigate this, a clear set of “DROP” rules must be established within the firewall interface. These rules specifically target the private IP ranges of the upstream network, such as the common 192.168.1.0/24 subnet. By creating a rule that drops all protocols originating from the GREEN network and destined for the home LAN, the administrator ensures that a compromised lab device cannot scan or attack other personal devices, even though it can still access the public internet.
Implementing these rules requires a nuanced understanding of how firewall policies are processed. In IPFire, the “Forward” firewall section handles traffic that passes through the router from one network to another. When configuring a DROP rule, the source is set to the Standard Network known as GREEN, and the destination is the specific IP range that needs protection. After the rule is applied, testing becomes essential. A simple ping test from a lab laptop to a device on the home network should fail, confirming the isolation is active. Meanwhile, a ping to a public DNS server like 1.1.1.1 should succeed, proving that the lab still has the external connectivity required for updates and research. This balance of total isolation from local peers and open access to the global web is the hallmark of a well-configured lab environment, providing a safe space for potentially dangerous experiments.
6. Activate the Wireless Access Point: Expanding Lab Mobility
Integrating wireless capabilities into a physical lab adds a new dimension of testing possibilities, but it requires careful configuration of the hostapd service. Once the wireless card is assigned to the BLUE zone, the administrator must install the necessary add-on packages to transform the hardware into a functional access point. This process involves setting the SSID, choosing the appropriate wireless mode—such as IEEE 802.11an for 5 GHz operations—and selecting a secure encryption standard. The BLUE zone acts as an independent wireless island, allowing mobile devices, tablets, and specialized wireless sensors to participate in the lab’s activities without ever touching the primary wired network. This physical separation is a major advantage for security researchers who need to analyze wireless traffic in a controlled, isolated environment.
However, the activation of a wireless access point often encounters a specific technical hurdle known as Dynamic Frequency Selection (DFS). On the 5 GHz band, many channels are shared with radar systems used by aviation and weather services. If the router is set to an automatic channel selection mode and happens to pick a DFS channel, it must perform a mandatory scan before it can begin broadcasting. This delay can cause the hostapd service to time out or fail to start entirely, leading to frustration for the administrator. To ensure the most stable connection for a laboratory environment, it is often best to manually select a standard 2.4 GHz channel or a non-DFS 5 GHz channel. By avoiding these automated pitfalls, the administrator guarantees that the BLUE network is always available and reliable, providing a consistent wireless target for all testing scenarios.
7. Create Targeted Access Exceptions: Controlled Communication
While strict isolation is the default state of a high-quality lab router, practical needs often require specific “holes” to be punched through the firewall. For example, an administrator might host a monitoring dashboard or a file server on the wired GREEN network that needs to be accessed by a tablet on the wireless BLUE network. Instead of opening the entire network, IPFire allows for the creation of highly targeted “ACCEPT” rules. These rules can be restricted to a single source IP, a single destination IP, and a specific TCP or UDP port. This principle of least privilege ensures that only the necessary traffic is allowed through, maintaining the overall security posture of the lab while enabling the required functionality. This granular control is far superior to the “all or nothing” approach found in consumer-grade hardware.
The process of creating these exceptions serves as an excellent educational tool for understanding network protocols. When an administrator allows TCP traffic for a web dashboard on port 7575 but does not allow ICMP traffic, they will find that they can load the website on their tablet while a ping to the same address fails. This distinction highlights the difference between application-level access and network-level visibility. In a physical lab, these targeted rules are used to build complex ecosystems where different zones can interact in a controlled, documented manner. Each rule added to the firewall is a deliberate policy decision, and the ability to enable or disable these rules with a single click makes the lab an incredibly dynamic environment for testing how different services react to varying levels of network connectivity.
8. Monitor Traffic and Performance: The Power of Visualization
A physical lab router is only as good as the information it provides to the administrator, and this is where advanced monitoring tools become indispensable. The Connections page in IPFire offers a real-time view of every active data flow passing through the system, complete with source and destination addresses, port numbers, and even geolocation data. This allows the administrator to see exactly where their lab traffic is going, providing immediate confirmation of whether a geoblocking rule or a specific firewall policy is working as intended. For instance, by visiting a website hosted in a different country and seeing the corresponding flag appear in the connections list, the user gains visual verification of the router’s tracking capabilities. This level of transparency is vital for identifying unexpected outbound traffic from lab devices.
In addition to real-time connection tracking, integrated graphical reports provide a historical perspective on the lab’s performance. Separate graphs for the GREEN, BLUE, and RED interfaces allow the administrator to compare bandwidth usage across different zones over days, weeks, or months. Hardware monitoring graphs are equally important, as they track CPU load, memory usage, and system temperatures, ensuring that the mini PC is not being overwhelmed by the demands of the lab. A dedicated firewall-hit graph shows the frequency of dropped or rejected packets, which can serve as an early warning sign of a misconfigured device or a potential security threat. These visualizations transform abstract network data into actionable insights, allowing the administrator to fine-tune their environment for maximum efficiency and security.
9. Troubleshoot Connectivity Issues: Overcoming DNS Hurdles
No network setup is completely without its challenges, and troubleshooting is an inherent part of the laboratory experience. One of the most common issues encountered during the deployment of a hardened router distribution involves the Domain Name System (DNS). Many specialized distributions enforce strict DNSSEC (Domain Name System Security Extensions) validation to protect against cache poisoning and other DNS-based attacks. If the upstream edge router’s DNS resolver is old or improperly configured, it may fail to handle these security protocols correctly, resulting in a “SERVFAIL” error. This can lead to a frustrating situation where the router has a valid internet connection but cannot resolve any website names, including its own update servers.
Solving these connectivity hurdles often requires bypassing the upstream DNS entirely and pointing the lab router toward a reliable public provider that fully supports modern security standards. By switching to providers like Cloudflare or Google and ensuring that DNSSEC validation is successful, the administrator can restore full functionality to the lab. This troubleshooting process reinforces the importance of the DNS layer in modern networking and teaches the administrator how to diagnose complex failures that go beyond simple physical connectivity. Once the DNS issues are resolved, the lab becomes a fully functional gateway to the global internet, protected by a suite of security protocols that are far more advanced than those found in standard consumer equipment. This final step in the setup process ensures that the lab is not just a collection of connected devices, but a professionally configured network environment.
The Implementation of a Physical Lab Environment
The implementation of IPFire in a physical lab environment demonstrated that robust network segmentation and clear visual boundaries are achievable even with modest hardware. By moving from a purely virtualized setup to a dedicated mini PC with multiple physical interfaces, the project achieved a level of reliability and observability that was previously missing. The color-coded zone model provided an immediate mental map that simplified the management of complex firewall rules, while the integrated monitoring tools offered deep insights into traffic patterns and hardware health. Although initial hurdles like DNSSEC validation and wireless frequency selection required some patience, the resulting network provided a secure and highly configurable sandbox for a wide variety of experimental workloads. The success of this setup proved that the physical act of connecting cables and observing real-time connection data significantly enhances the administrator’s understanding of their digital perimeter.
Looking ahead, the next logical steps for this laboratory environment involve the integration of more advanced security features, such as the Intrusion Prevention System (IPS) and advanced web proxying. As network threats continue to evolve from 2026 to 2028, the ability to inspect packet payloads and filter content at the edge will become increasingly important for maintaining a safe testing space. Furthermore, the modular nature of this distribution allows for the addition of specialized packages that can turn the router into a VPN gateway or a centralized logging server. For anyone looking to build a serious physical lab, the combination of dedicated hardware and a zone-based firewall distribution remains the most effective strategy for creating a professional-grade network. The focus should now shift toward documenting common attack patterns within the lab and using the router’s logging capabilities to build a comprehensive library of security insights for future research.