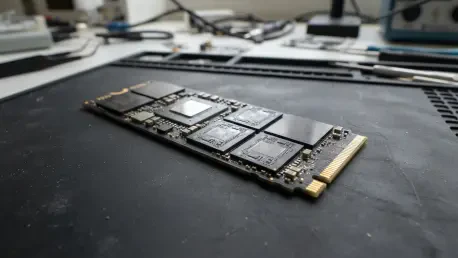

A cryptographic erase destroys the media encryption key in seconds, rendering every block of data on a self-encrypting drive completely indistinguishable from noise. This process represents the gold standard for data sanitization in 2026, where high-density flash storage has become the backbone of both consumer electronics and enterprise data centers. Unlike traditional hard disk drives that store data in fixed physical locations, solid-state drives employ a complex flash translation layer that constantly moves data across cells to ensure even wear. This mechanical reality means that standard file deletion or a simple formatting pass merely hides data from the operating system while leaving the underlying bits intact within the physical NAND gates. For anyone handling sensitive financial records, proprietary corporate data, or personal identification information, understanding the distinction between logical deletion and physical sanitization is no longer optional. The modern storage landscape demands a move toward controller-level commands that address the drive’s firmware directly, bypassing the abstractions of the file system to guarantee that no trace of the original information remains behind. By utilizing standardized protocols like NVMe Sanitize and ATA Security Erase, professionals can ensure that retired hardware does not become a liability. This guide outlines a rigorous, technical methodology for achieving total data destruction while maintaining the physical integrity and performance of the hardware for its next lifecycle.
Technological advancements in the current 2026 to 2028 window have made storage recovery tools more accessible than ever, increasing the risk for those who neglect proper sanitization. A drive that appears empty to a casual user might still harbor vast amounts of recoverable data in its over-provisioned areas or unallocated blocks. The controller of an SSD manages a pool of spare capacity that remains invisible to the operating system, used primarily for replacing worn-out cells and improving write performance. When a file is deleted or a drive is formatted via standard OS tools, these internal pools are often left untouched, providing a fertile ground for forensic software to reconstruct sensitive documents. Furthermore, the implementation of TRIM commands, while helpful for performance, does not provide a guaranteed or immediate erasure of physical data. To achieve a state of true data non-recoverability, one must leverage the internal logic of the drive’s controller through specific administrative commands. This approach ensures that every physical location on the NAND media, including those hidden from the logical block addressing scheme, is effectively cleared or rendered unreadable.
1. Step 1: Duplicate and Verify Your Data
Before initiating any destructive operation, the first priority must be the absolute preservation of necessary information on a separate, verified medium. Copying files is only the initial half of a successful backup strategy; the secondary, and arguably more critical, phase involves the rigorous verification of that data’s integrity. In the fast-paced environment of 2026, where data volumes are massive, a silent corruption during the transfer process can lead to the permanent loss of vital records if the source is wiped before the error is discovered. Technicians should utilize checksum-based verification tools to ensure that every byte on the backup matches the original source. Opening a representative sample of documents, databases, and media files from the backup drive provides a final, human-readable confirmation that the transfer was successful. This proactive stance prevents the common tragedy of discovering a failed backup only after the primary storage device has been reduced to digital noise through a successful cryptographic or block-level erase.
Beyond simple file duplication, specific attention must be paid to encrypted volumes and specialized application data that may reside in hidden directories. For systems utilizing LUKS encryption on Linux, it is highly recommended to execute the cryptsetup luksErase command as a preliminary measure. This specific action targets the encryption headers and key slots, destroying the master key before the drive-wide wipe even begins. Such a multi-layered approach ensures that even if a theoretical breakthrough in flash memory recovery were to occur, the data retrieved would still be protected by the absence of its original decryption headers. Additionally, users should export password manager databases, browser profiles, and software licenses that are often tied to specific hardware IDs. Many modern applications in 2026 utilize hardware-bound licensing that must be deactivated or “checked out” before the underlying system is decommissioned. Failing to do so can result in significant administrative hurdles when attempting to reactivate that software on a new machine.
The final consideration for a comprehensive backup involves the systemic identification of all partitions and hidden recovery areas that might contain sensitive configuration files. Many original equipment manufacturer systems include hidden partitions that store factory images, which could potentially contain user-specific network settings or pre-installed credentials. While the primary goal is to save personal and work data, a thorough audit of the drive’s layout ensures that no architectural information is lost that might be required for a future system restoration. Once the backup is complete and its integrity is confirmed through multiple verification passes, the physical backup drive should be disconnected from the system. This physical isolation prevents any accidental command entry or automated script from targeting the backup media during the high-risk wiping phase. By the end of this step, the user should have complete confidence that their digital life is safe on another device, allowing them to proceed with the total destruction of the target drive without hesitation.
2. Step 2: Pinpoint the Drive by Its Serial Number
Identifying the correct target disk in a Linux environment requires a departure from relying on volatile device names such as /dev/sda or /dev/nvme0n1. These designations are assigned dynamically by the kernel during the boot process and can shift based on which controller initializes first or if external storage is connected. In a multi-drive system, mistakenly targeting the boot drive instead of the intended secondary SSD is a catastrophic error that happens with alarming frequency. To avoid this, one must rely on static identifiers that are physically etched into the hardware, such as the model name and the unique manufacturer serial number. By using the command sudo lsblk -o NAME,PATH,TYPE,SIZE,MODEL,SERIAL,TRAN,ROTA,MOUNTPOINTS, a detailed map of the system’s storage topology is revealed. This output provides the necessary context to correlate the logical device path with the physical drive sitting in the machine.
When analyzing the output of the lsblk command, special attention should be directed toward the mountpoints and the transport type. A drive that currently has active mountpoints is likely the host of the running operating system or contains partitions that are in active use by the system. Any attempt to perform a low-level sanitize command on an active partition will generally be blocked by the kernel to prevent system instability, but it remains a critical safety check for the technician. The transport column, labeled TRAN, is equally vital in 2026 as it distinguishes between native NVMe or SATA connections and those facilitated by USB bridges. Many external SSD enclosures utilize USB-to-NVMe bridges that do not correctly pass through the specific administrative commands required for a secure wipe. If the target drive is listed as a USB device, the technician must be aware that the sanitize commands might fail or return a false positive, necessitating a direct motherboard connection for the most reliable results.
Once the target drive is identified by its serial number, it is prudent to cross-reference this information with the physical label on the SSD itself if it is accessible. This “double-blind” verification ensures that there is no ambiguity about which piece of hardware is being cleared. In enterprise environments or data centers, this step often involves a physical tag or a digital handshake where the drive’s LED is blinked to confirm its location. For the individual user, simply writing down the last four digits of the serial number and the total capacity acts as a safeguard. This information will serve as a confirmation string later in the process, ensuring that the final “point of no return” command is issued only after a conscious verification of the target hardware. Accurate identification is the foundation of a safe data sanitization workflow, turning a high-risk operation into a controlled and predictable technical task.
3. Step 3: Launch a Live Linux Session and Fetch Utilities
Executing a secure wipe from within the installed operating system is often impossible because the drive’s controller cannot be properly addressed while the system is actively reading and writing to it. To bypass this limitation, one must boot into a live Linux environment from a USB flash drive, which loads the entire operating system into the computer’s volatile RAM. This state leaves the target SSD completely unmounted and idle, allowing for the direct transmission of administrative commands to the firmware. Popular distributions like Ubuntu, Fedora, or Debian provide robust live environments that include the necessary drivers for modern NVMe and SATA controllers. Once the system has booted into the “Try Linux” mode, the environment provides a clean slate where no background processes or file indexing services will interfere with the low-level access required for the sanitization process.
After establishing the live session, the next priority is to ensure that the environment is equipped with the latest versions of specialized storage utilities. While many live ISOs include basic tools, the rapid evolution of storage protocols between 2026 and 2028 means that manual updates are often necessary to support the newest drive features. The core utilities required are nvme-cli for NVMe-specific tasks, hdparm for SATA security commands, and util-linux for general block device management. On a Debian-based system like Ubuntu, these can be fetched using the standard package manager with the command sudo apt update && sudo apt install -y nvme-cli hdparm util-linux python3. Fedora users would achieve the same result via dnf. Accessing a stable internet connection during this phase is crucial, as the versions of these tools found in the default repository are more likely to handle modern sanitize logs and cryptographic protocols correctly than those baked into an older ISO image.
The role of the Python interpreter in this workflow is to facilitate the execution of complex verification scripts and audit reports. While the individual commands can be run manually, a script-based approach reduces the likelihood of syntax errors and provides a consistent framework for logging the results. In 2026, automation has become a standard requirement for data sanitization to ensure compliance with increasingly strict privacy regulations. By having Python 3.10 or newer available, the technician can run sophisticated checks that sample random sectors of the drive to verify that the wipe was successful. This preparation phase sets the stage for a professional-grade execution, transforming a simple command-line task into a verifiable and documented technical process. With the tools installed and the drive sitting idle in an unmounted state, the system is finally ready for the critical hardware-level interrogation.
4. Step 4: Inspect the Hardware’s Erase Features
Before choosing a specific wiping method, it is essential to understand the capabilities and limitations of the drive’s firmware. Not all SSDs are created equal, and the commands available to a high-end enterprise NVMe drive differ significantly from those on a budget SATA model or an older legacy stick. For NVMe devices, the nvme-cli tool provides a comprehensive view of the controller’s features through the command sudo nvme id-ctrl /dev/nvmeX -H, where X represents the controller number identified in Step 2. The technician must look for the sanicap (sanitize capabilities) field, which indicates whether the drive supports cryptographic erase, block erase, or overwrite operations. A value of 0x01 typically indicates support for crypto-erase, while 0x02 adds support for block erasure. Knowing these values ahead of time prevents the frustration of attempting a command that the hardware is physically incapable of executing.
The investigation of SATA drives follows a different path, utilizing the hdparm utility to query the drive’s identity and security status. Running sudo hdparm -I /dev/sdX will return a wealth of information, specifically within the “Security” section of the output. Here, the drive will report whether it is “supported,” “enabled,” “locked,” or “frozen.” A “supported” status is the prerequisite for all further actions, while “enabled” or “locked” states might indicate an existing BIOS password that must be cleared. Most importantly, the “frozen” state is a common security feature where the system BIOS locks the drive’s security settings at boot to prevent malicious software from wiping the disk. If a drive is frozen, it will refuse any security commands, necessitating a “thaw” through a system suspend-and-resume cycle or a physical hot-plugging of the SATA data cable if the hardware supports it.
Understanding the “Optional Admin Command Support” (OACS) and “Format NVM Attributes” (FNA) is also critical for NVMe drives that might not support the modern Sanitize command. If the sanicap field returns zero, the technician must look at the OACS bit to see if the “Format NVM” command is supported. This older protocol can often achieve a secure erase by setting specific flags that instruct the controller to clear the user data during the formatting process. However, the behavior of Format NVM is more vendor-dependent than the Sanitize command, which is governed by more rigorous standards in the NVMe specification. By carefully mapping out these capabilities in Step 4, the technician can select the most efficient and secure path forward, ensuring that the chosen method aligns perfectly with the hardware’s engineered strengths. This diagnostic phase is the difference between a technician who merely types commands and a professional who understands the underlying storage architecture.
5. Step 5: Perform a Crypto Erase
When the hardware interrogation in the previous step confirms support for cryptographic erase, this method should always be the primary choice for modern SSDs. A cryptographic erase works on a fundamentally different principle than traditional data overwriting; it targets the internal media encryption key that the drive uses to scramble all data written to the NAND flash. Even if a user never explicitly set a password, most modern SSDs in the 2026 era are “self-encrypting drives” (SEDs) that encrypt all data at the hardware level by default. By issuing the command sudo nvme sanitize /dev/nvmeX --sanact=4, the technician instructs the controller to instantly discard the current encryption key and generate a new, randomized one. Without the original key, the billions of bits currently stored on the physical media become mathematically indecipherable noise, providing a level of security that is effectively unbreakable with current technology.
The speed of this operation is its most striking advantage, often completing in under a minute regardless of whether the drive is 500 gigabytes or 30 terabytes in capacity. Because the controller only needs to change a small internal key rather than cycling every physical flash cell, the process is nearly instantaneous from the perspective of the host system. This efficiency makes it the ideal solution for large-scale data center decommissioning or for individuals who need to clear multiple drives quickly and securely. Moreover, since no physical writes occur across the bulk of the NAND media, a crypto erase does not consume any of the drive’s finite write endurance. This preservation of hardware health is a significant benefit when the intention is to resell the drive or repurpose it for another task, as it remains in the same physical condition as it was before the sanitization began.
However, the efficacy of a cryptographic erase is entirely dependent on the integrity of the manufacturer’s firmware and their implementation of the encryption standards. In high-security environments where the utmost certainty is required, some policies may mandate a physical erasure in addition to the cryptographic one. For the vast majority of users, the crypto-erase protocol provided by the NVMe specification is more than sufficient and represents a massive leap forward from the days of multi-pass overwriting. It is important to note that once this command is sent and confirmed, there is no possibility of reversal. The data is not just “deleted” in the sense of being hidden; the cipher required to read it has been permanently destroyed. This step transitions the drive from a repository of sensitive information into a blank slate of encrypted randomness, ready for its next deployment or owner.
6. Step 6: Apply Block Erase or Overwrite as an Alternative
In scenarios where a drive does not support cryptographic erase, or where local security policies demand a physical clearing of the NAND cells, the “Block Erase” method serves as a robust alternative. Unlike the key-destruction approach, a block erase sends a command to the controller to physically clear the electrical charge within the flash memory cells. By running sudo nvme sanitize /dev/nvmeX --sanact=2, the technician triggers an internal process that resets the NAND blocks to their original, empty state. This method is highly effective because it reaches the physical media directly, ensuring that no residual data remains in any of the visible or hidden areas of the drive. While it is slower than a crypto-erase—taking several minutes depending on the size and speed of the flash—it provides a tangible sense of security by physically altering the storage medium.
The “Overwrite” action, initiated with the flag --sanact=3, is the third and most traditional option within the Sanitize feature set. This method involves the controller writing a specific pattern, often all zeros or a randomized sequence, across the entirety of the drive’s addressable space. This is the slowest of the three sanitize operations and is generally reserved for drives that do not support the more advanced cryptographic or block-level commands. While it is effectively a “brute force” approach to data destruction, it is still superior to a host-side overwrite because it is managed entirely by the drive’s internal controller. This allows the process to account for internal mapping and caches that a standard operating system write would typically miss. In the current era of 2026, overwrite sanitize is increasingly rare as a primary method but remains a critical fallback for ensuring compatibility across a wide range of older hardware.
Selecting between these methods requires a balance of speed, security requirements, and hardware longevity. Block erase is often seen as the best middle ground for drives staying within an organization, as it clears the cells physically without the potential complexity of key management. Overwrite is the last resort, as it subjects the NAND to a full write cycle, which slightly reduces the drive’s total lifespan. Regardless of the chosen action, the technician must remember that the command initiates a background process. The return of the command line prompt does not mean the wipe is finished; it only means the drive has accepted the instruction. The real work is happening deep within the silicon of the SSD, and interrupting the power during this phase can lead to a “bricked” or locked device. This sets the stage for the next critical step: monitoring the progress to ensure the operation reaches a successful conclusion.
7. Step 7: Monitor the Sanitize Progress Log
Because sanitization is a background operation that occurs within the drive’s firmware, the technician must actively poll the device to determine when the process has reached completion. This is handled through the sanitize log, a specific area of the drive’s internal memory that reports on the status and progress of the ongoing operation. In the 2026 versions of nvme-cli, this is accessed via sudo nvme log sanitize /dev/nvmeX, which provides a real-time snapshot of the controller’s state. The output includes a progress indicator, often represented as a fraction of 65,536, and a status code that reveals whether the operation is still running, has succeeded, or has encountered a critical error. Monitoring this log is the only way to be certain that the drive has actually finished the task it was assigned.
Interpreting the status codes is vital for a successful audit of the sanitization process. A status of 0x2 indicates that the sanitize is currently in progress, and the technician should continue to wait and poll the log at regular intervals. A status of 0x1 signifies a successful completion, meaning every block targeted by the command has been cleared or the key has been successfully rotated. In some modern drives, a status of 0x4 might be seen, which indicates that the sanitize finished successfully and that the drive has also deallocated the media, effectively “trimming” the entire device in one go. If the log returns a failure code, it is often due to a power fluctuation or a hardware fault, and the process must be restarted from the beginning. A drive that reports a failed sanitize should be treated as still containing sensitive data and must not be retired until a successful pass is recorded.
The importance of the sanitize log cannot be overstated in the context of professional data handling and compliance. It serves as the primary technical evidence that the sanitization command was not only issued but was also successfully executed by the drive’s hardware. In an automated workflow, a script can poll this log every few seconds and only proceed to the verification phase once the success code is detected. This prevents the common mistake of prematurely assuming a drive is clean just because the initial command returned without an error message. For the individual user, simply watching the progress bar reach 100% and seeing the final success status provides the peace of mind that the sensitive data has been truly destroyed. With the log confirming success, the technician can move forward knowing that the drive’s internal state is now consistent with the goal of total data sanitization.
8. Step 8: Execute Format NVM if Sanitize Is Unavailable
When dealing with older NVMe drives or budget models that do not implement the modern Sanitize feature set, the “Format NVM” command provides an alternative path for secure data removal. While a standard format merely recreates the file system metadata, the nvme-cli format command can be passed specific “Secure Erase Settings” (SES) that instruct the controller to perform a deeper wipe. By executing sudo nvme format /dev/nvmeXn1 --ses=2 --force, the technician can request a cryptographic erase of the specific namespace. If the drive supports it, this will achieve a result similar to the sanitize command, though it is limited to the namespace level rather than the entire controller. For drives that do not support crypto-erase via format, using --ses=1 will trigger a standard user data erase, which clears the addressable blocks through an internal overwrite or block-level reset.
It is important to understand the technical nuances that differentiate Format NVM from the Sanitize command. Format NVM is primarily a management tool for changing the LBA (Logical Block Address) format or clearing a specific namespace, and its secure erase capabilities are often considered “optional” by the NVMe specification. This means that the exact implementation can vary wildly between manufacturers; some may perform a full physical erase, while others might do something closer to a comprehensive TRIM. Because it lacks the rigorous background monitoring and completion logs of the Sanitize protocol, it is generally considered a lower-assurance method. However, in the 2026 to 2028 landscape, where some legacy hardware still exists in the secondary market, it remains an essential tool in the technician’s arsenal for ensuring that no drive is left with readable data.
The --force flag in the format command is a necessary safety mechanism that requires the user to acknowledge the destructive nature of the operation. Without it, nvme-cli will often refuse to proceed, acting as a final barrier against accidental data loss. When using this method, the technician should also be aware that formatting a namespace can sometimes change the drive’s reported capacity or block size if the wrong parameters are passed. After the format is complete, it is wise to run sudo nvme list to ensure the drive still appears with the expected logical configuration. Although Format NVM is a fallback, it represents a significantly more secure option than simply deleting a partition or using host-side wiping tools. By understanding when and how to deploy this command, a technician can handle a broader range of hardware while still maintaining a high standard of data security.
9. Step 9: Initiate ATA Security Erase
For SATA-based SSDs, the “ATA Security Erase” protocol is the industry-standard method for performing a hardware-level wipe. This process is initiated using the hdparm utility and requires a specific sequence of commands to overcome the drive’s built-in security protections. First, the technician must set a temporary user password on the drive, which is a prerequisite for the firmware to accept the erase instruction. This is done with the command sudo hdparm --user-master u --security-set-pass TempPass123 /dev/sdX. Once the password is set, the drive enters a “security enabled” state, allowing the technician to issue the final erasure command: sudo hdparm --user-master u --security-erase TempPass123 /dev/sdX. The drive then takes over the process, cycling through its physical blocks to clear the data before automatically removing the temporary password upon successful completion.
The “frozen” state mentioned in Step 4 is the most common obstacle encountered during a SATA security erase. Many modern motherboards automatically freeze the drive’s security settings during the boot process to prevent unauthorized software from locking or wiping the disk. To bypass this, the technician must “thaw” the drive, which is typically achieved by putting the computer into a sleep or suspend state and then waking it up. This power cycle of the drive, without a full system reboot, often clears the frozen flag, allowing hdparm to proceed. In some specialized technician workstations, this can also be achieved by briefly disconnecting the SATA power or data cable while the system is running, though this carries a slight risk of hardware damage and should only be done if the controller supports hot-plugging.
ATA Security Erase comes in two variants: “normal” and “enhanced.” The normal erase typically overwrites all user-accessible blocks with zeros, while the enhanced version can also target remapped blocks, bad sectors, and internal caches, often using a manufacturer-defined cryptographic or high-level clearing method. If the hdparm -I output from Step 4 indicates that “enhanced erase” is supported, it is highly recommended to use the --security-erase-enhanced flag for a more thorough sanitization. This ensures that even the data stored in sectors that the drive has retired due to age or wear is effectively neutralized. By the end of this step, a SATA drive is returned to a factory-fresh state, with its security settings reset and its physical media cleared of any previous user information.
10. Step 10: Utilize Blkdiscard for Internal Reuse Only
In situations where a drive is being repurposed within the same organization or household, the blkdiscard utility offers a fast and effective way to reset the drive’s performance. This tool sends a “discard” or TRIM command to the SSD’s controller for the entire range of its storage capacity. When the controller receives a discard command for a block, it marks that data as no longer valid, allowing its internal garbage collection routines to clear the underlying flash cells at its convenience. Running sudo blkdiscard -v /dev/nvmeXn1 is nearly instantaneous and results in a drive that appears empty to the operating system, with the added benefit of restoring the write speeds to their original factory levels by providing the controller with a large pool of ready-to-use empty blocks.
However, it is critical to emphasize that blkdiscard is not a high-assurance sanitization method for drives leaving your control. Because the discard command is essentially a “hint” to the controller, the actual physical erasure of the data may not happen immediately. On many modern drives in 2026, reading a discarded block will return zeros, giving the illusion that the data is gone. Yet, the original bits may still physically exist on the NAND chips until the controller’s internal logic decides to perform the actual erase cycle. For an attacker with specialized hardware or the ability to bypass the controller’s logical mapping, this data might still be recoverable for a period of time. Therefore, blkdiscard should be viewed as a performance-tuning tool rather than a security utility.
The primary use case for blkdiscard is during the re-installation of an operating system or when shifting a drive from one internal project to another. It provides a “fresh start” for the drive’s firmware, ensuring that the new installation is not hampered by the fragmented state of the previous file system. It is also a useful way to quickly clear partition tables and file system signatures that might interfere with disk management tools. When used in this context, it is a valuable part of a storage maintenance workflow. But if the goal is to sell the drive on the open market or return it to a manufacturer for a warranty claim, the more rigorous sanitize or security erase methods described in the previous steps remain mandatory. Understanding the limitations of blkdiscard ensures that it is used appropriately without creating a false sense of security regarding data permanence.
11. Step 11: Validate the Process With Canary Blocks
A professional data sanitization workflow is never complete without a verification phase that proves the efficacy of the wipe. Relying solely on the success message of a command is a gamble; “canary blocks” provide the empirical evidence required to confirm that the data is truly gone. This methodology involves writing a unique, recognizable pattern of data—the canaries—to several random locations across the drive before the sanitization process begins. By recording the exact sector addresses where these canaries were placed, the technician creates a set of “test pits” that can be inspected after the wipe. If the sanitization was successful, the unique patterns should be completely missing, replaced by zeros, ones, or the randomized noise of a cryptographic erase.
To implement this manually, one can use the dd utility to write a small amount of data from a custom file to various parts of the disk. For example, creating a file containing the string “CANARY-DATA-TEST” and writing it to the first, middle, and last gigabyte of the drive provides a good sample of the drive’s addressable space. After the sanitize or security erase is finished, the technician then uses dd in conjunction with a tool like hexdump or grep to read those exact locations back. If even a single instance of the canary string is found, it indicates a catastrophic failure of the sanitization process. This could be due to a faulty controller, a USB bridge blocking the command, or a firmware bug that silently skipped certain sectors. The presence of a survivor means the drive is still “dirty” and must be re-evaluated and re-wiped.
In 2026, automated scripts have made this process both faster and more thorough by placing hundreds of canaries in a randomized pattern that covers a significant percentage of the drive’s architecture. This statistical approach provides a high degree of confidence that no “islands” of data were missed by the controller’s internal routines. Furthermore, modern verification also involves sampling random blocks to check for entropy. A drive that has undergone a cryptographic erase should return high-entropy, randomized data that lacks any discernible structure. Conversely, a drive cleared via block-erase or discard should typically return a uniform pattern of zeros. By combining canary checks with entropy analysis, a technician can provide a definitive proof-of-erasure that stands up to forensic scrutiny, completing the technical journey from sensitive storage to a demonstrably clean device.
12. Step 12: Generate a Final Audit Report With Python
The final step in a professional sanitization protocol is the creation of a detailed audit report that documents every aspect of the operation. In the current regulatory environment, simply claiming that a drive was wiped is often insufficient; one must provide a verifiable record of the hardware involved, the methodology used, and the results of the verification phase. A Python script is the ideal tool for this task, as it can automatically collect the drive’s serial number, model, and capacity, and then pair that with the timestamps and status codes from the sanitize operation. By outputting this information into a standardized JSON or PDF format, the technician creates a “birth certificate” for the clean drive that can be passed along to the next owner or filed for compliance purposes.
This audit report should include the SHA-256 hash of the verification log to ensure that the record itself has not been tampered with. It should clearly state whether the drive was cleared via cryptographic erase, block erase, or ATA security erase, as these different methods carry different levels of assurance for various security standards like NIST SP 800-88. Including the host system’s identification, such as the motherboard’s serial number or the technician’s ID, adds an extra layer of accountability to the process. For organizations managing large fleets of devices, these reports are often aggregated into a central database, providing a complete lifecycle history for every storage asset. This level of documentation is what separates a casual home user from a professional IT asset disposition (ITAD) specialist.
Furthermore, the audit report acts as a vital safety net in the event of a future data breach inquiry. If a retired drive were ever found to contain sensitive information, the existence of a signed, timestamped report proving a successful sanitize and canary verification would be the primary defense against claims of negligence. It shows that the organization followed industry-standard best practices and utilized the most advanced tools available in the 2026-2028 timeframe. Once the report is generated and the SHA-256 hash is recorded, the sanitization process is officially complete. The drive is now a “known good” asset, ready for resale, recycling, or reuse with the absolute certainty that its previous life has been permanently and verifiably erased. This final act of documentation transforms a technical task into a professional accomplishment.
Future Considerations for Data Sanitization
The technical journey of securely wiping a solid-state drive reached its conclusion with the successful generation of a verified audit report. Throughout this 12-step process, the transition from simple file deletion to sophisticated hardware-level sanitization was explored, highlighting the critical role of the drive’s internal controller. By leveraging cryptographic erasure and block-level resets, the methodology addressed the unique physical challenges posed by NAND flash architecture. The use of a live Linux environment ensured that no operating system abstractions interfered with the direct communication between the technician’s tools and the SSD’s firmware. This approach not only guaranteed the destruction of sensitive data but also preserved the physical integrity and performance of the hardware for its next user.
As storage technologies progressed from the standard NVMe 2.0 specifications of the early 2020s toward the more integrated and self-healing architectures seen in 2026, the importance of standardized protocols became even more apparent. The shift toward self-encrypting drives as the industry default simplified the sanitization landscape, making the cryptographic erase a nearly universal and highly reliable tool. However, the continued existence of legacy SATA hardware and the occasional limitations of USB bridges served as a reminder that a technician’s expertise remains the most important factor in the sanitization process. The rigorous verification through canary blocks and entropy analysis provided the empirical evidence needed to trust the automated logs, bridging the gap between theoretical security and practical certainty.
Looking back on the completed workflow, it was clear that the methodology satisfied the most stringent requirements for data privacy and hardware lifecycle management. The final audit records were archived as proof of compliance, ensuring that every retired storage device met the necessary security standards before leaving the organization’s control. For those who followed these steps, the risk of data leakage was effectively eliminated, replaced by a documented and repeatable professional standard. The move toward hardware-level sanitization represents a fundamental shift in how digital footprints are managed, ensuring that the remnants of the past do not become the vulnerabilities of the future. With these skills mastered, the technician secured not just the data, but the reputation and liability of the entire digital infrastructure.